Creating a Jigs@w Puzzle
Using Jigs@w Puzzle by Tibo Software
A little tutorial which will show members how to create their own jigsaw puzzles. Even if you already know how to do this you may find a few interesting tips included.
To visit the group click the link below
http://groups.yahoo.com/group/Jigsaw_Puzzle_Fans/
Within this tutorial I will show you how you can create and share your own jigsaw puzzles using Jigs@w Puzzle by Tibo Software.
#1: Choosing a photo Perhaps the best thing about making your own jigsaw puzzles is the fact that you can use
any photo you like. Using a scanner or digital camera you can make jigsaw puzzles of your very own photos, or if you like you can download photos from the internet and use those.
When saving photos to your computer be sure to place them someplace where you can easily find them, so it will be easier on you when you go to make your puzzles. I keep all the photos I use for puzzles within one or two sub folders which I have created within My Documents folder. If you're not familiar with creating folders you can always save your photos to the "My Documents" or "My Pictures" folder on your computer. That's usually where most of them are kept anyway.
#2: Creating a jigsaw puzzle
Ok, here's where the fun part starts ! Start up your Tibo Jigs@w Puzzle program, it's time to get busy !
When the program opens you'll see your storage room. Below is a picture of what mine looks like at the moment.
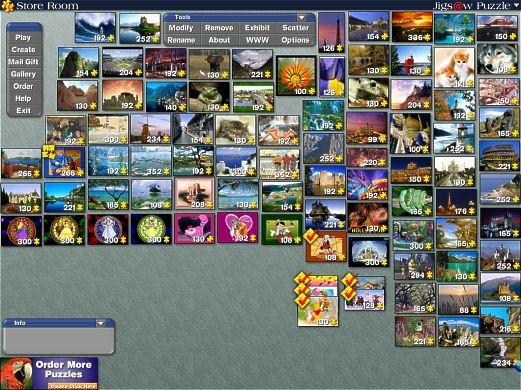
It probably won't look like this for long as I am constantly making new puzzles and moving some of my older ones.
To begin creating your puzzle click on the "Create" button.

This takes you into another room, the "Create Room"
Next you'll need to click on the "Import" button
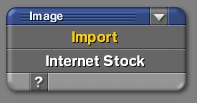
Note that there is also the "Internet Stock" button here. Clicking that will take you to the Tibo Software website, where they have included a few links to some stock photography. For this tutorial we'll just be using the import button, assuming you've already got a photo or perhaps a few already saved on your computer which you'll be using.
Now it's
time to search for your photo on your computer. Remembering where you saved your photos, open the file and select the photo you wish to make into a puzzle. Click OK and it will open up in the Create Room.
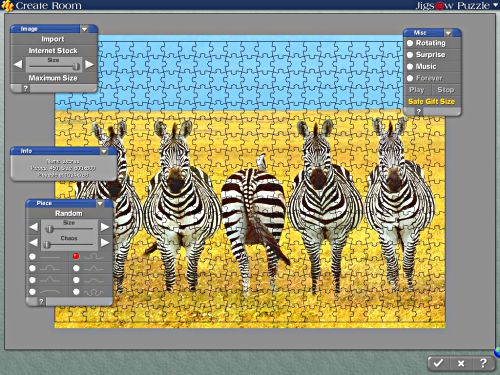
Hey, it's Zebras ! Think that one in the middle is trying to tell us something ?
Ok, looking at the above photo you will see that there are four tabs or sections. One which says "Image", another which says "Info", one which says "Piece" and one more which says "Misc." Notice the first one (top left) which says "Image" in blue. Again we see the "Import" and "Internet Stock" options. This means that if we're not happy with the image we chose we can easily choose another by clicking either of those. But I like this one, so lets stick with it !
Also notice that on the same tab it reads "Size" and you'll see a slider underneath.
Sliding this all the way to the right makes the photo larger and sliding it to the left makes it smaller. You'll also notice the "Maximum Size" button. Clicking this will make the phot the original size (whatever size you saved it as). Move the Size slider left and right a bit to see how it works. Next we're going to take a look at the "Info" tab which in this pic is just below the Image tab. This is kind of the brains of the Create Room. It lets us know a lot about the picture as well as the puzzle. First of all it tells us the name of our photo, in this case it's named Zebras. Just below that we see the amount of pieces as well as the size of the photo. In this image there are 450 pieces and the size of the photo is 800x600 pixels which equals 8x6 inches. Right below the size you'll see "Playable At" 1024x768. Now a puzzle of this size is good for someone who has their screen resolution set to 1024x768, but it's not good for anyone who's resolution is at
a smaller size. This can cause the puzzle to not load properly for someone who has their screen resolution set at 800x600. Diane and I managed to figure this out when she had problems getting a few of my puzzles to load. So this is important ! We'll want to make sure that we size our puzzle so that everyone can enjoy it. We can do this either by moving the slider to make our picture smaller, till we see the "Playable At" reads 800x600, or we can click the "Safe Gift Size" button which is located on the "Misc." Tab ( in the above image the Misc tab is at the top right and the "Safe Gift Size" is highlighted in yellow.) For this puzzle I decided to adjust the size slider till the "playable at" in the Info Tab read 800x600. Most people use either 800x600 or 1024x768 resolution, so by adjusting our puzzles to (playable at 800x600) is usually a safe way to go.
Ok, now lets talk a little more about these 4 different tabs.
We've covered the Image Tab, which
helps us to adjust the size of our photo. With that we can import a different photo if we want to change the one we have, visit the Tibo Software website to search for stock photos, click the "maximum size" button to make out photo it's original size, or use the slider to adjust the size.
The Info Tab: As stated above, the Info tab is the "brains" within the Create Room. It tells us the name of our photo, how many pieces are within the puzzle, the size of the photo and the resolution at which it is best playable. When creating puzzles we'll want to check this often to make sure our puzzles are compatable for everyone.
The Piece Tab: Here is where we get creative. You'll see the section marked "Random" and two sliders under it, one for size and the other for chaos. Moving the size slider left makes the puzzle pieces smaller, moving the slider right makes the pieces larger.. Be sure not to make your puzzle pieces too small, or some people won't be
able to see them to do the puzzle. The Chaos slider manages to alter the shape of the puzzle pieces, so all of your pieces don't look the same. Be careful when adding chaos to your pieces, especially if your pieces are small. Below these two sliders you'll see the shapes which are available for your pieces. There are 8 different shapes to choose from.
Next lets cover the "Misc." Tab. On this tab we have a few options to choose from which can be use in making our puzzle.
- Rotating: Clicking this will give us rotating pieces.
- Surprise: Clicking this will make it so we have no preview image of what our puzzle will look like. It's a surprise ! I wouldn't suggest making puzzles which have a lot of pieces a surprise as it may be difficult for your friends to complete them without seeing a picture to go by. But then again if you like to torment your friends, by all means feel free to do so. When you make a puzzle a surprise you don't even
see a small pic of it within your storage room, instead you'll see a little blue gift box. Also surprise puzzles do not allow you to use the ghost feature when working on the puzzle.
- Music: Yes, you can add music to your puzzles if you wish, however please keep in mind that music files can often be large and when added to a puzzle could mean a much longer download time when you send the puzzle to your friends.
- Forever: This goes hand in hand with Music, it will loop the music file over and over till the puzzle is complete.
- Play and Stop: These too are used only when adding music files to your puzzles.
- Safe Gift Size: This may be the button you'll be using most on this tab. Clicking the Safe Gift Size button will automatically resize your photo to a size which is safe for anyone's screen resolution. It also automatically sets your puzzle to 25 pieces or less, however you can change that using the Size slider on the Piece Tab. You can create small puzzles, 25 pieces or less and send them to anyone.... even people who do not have Tibo Jigs@w Puzzle installed on their computer.
Ok, now lets see how this looks .....
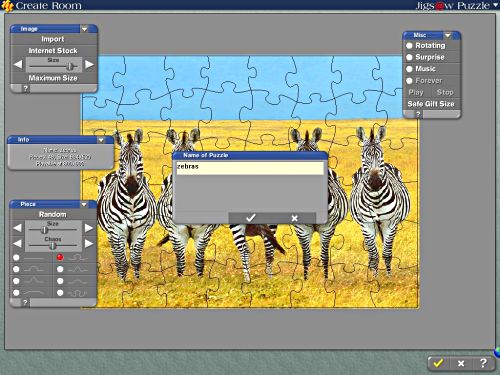
Here I have reduced the size of my photo using the Size slider on the Image tab. I then adjusted the size of the pieces using the Size slider on the Piece Tab. Check the Info tab in this pic and you'll see that there are 48 pieces in this puzzle, the photo size is now 694x520 and it is playbale at 800x600 You can also see that I have adjusted the Chaos slider about half way to give the pieces a unique shape so they don't look all the same. Clicking the check mark in the lower right pops up the box you see in the middle of the photo. Here is where you can name your puzzle. The name of the photo will automatically appear in this box, but if you'd like to
change it to something else you may at this point. I'm just naming this one Zebras, just as the photo is named. Next click the checkmark below the new puzzle's name and our new puzzle is saved. It's that easy !
Your new puzzle may now be found within your storage room, awaiting to be put together.
And here's how our completed puzzle came out
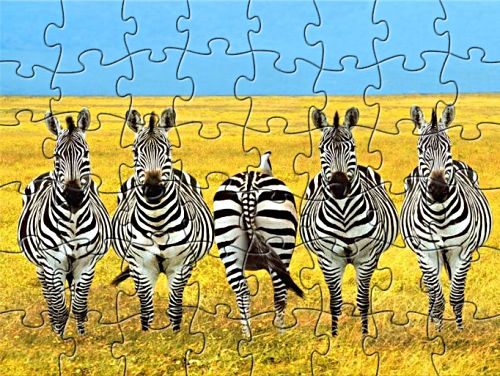
Not too bad !
Hopefully now everyone here will know how to go about creating their own Jigsaw Puzzles. If you don't get it right the first time don't worry, it can be a little tricky till you manage to get it. I'll be working on a tutorial which will show you how to save your puzzles as .exe files which you can share with friends, or upload to the group to share with the other members.


